Before switching to a new email host, also known as email migration, start by backing up your emails and data. Then, sign up with the new host and set up your email accounts there. Update your domain settings to point to the new host. Lastly, make sure your business email account is working correctly.
Simple, isn’t it?
You can move from a casual [email protected] to a professional [email protected] and let your potential customers know you mean business.
However, while the process is simple, it is still best to follow a guide to avoid errors.
Here’s our detailed guide on how to transfer email hosting hassle-free.
How to Transfer Email Hosting From One Host to Another
Transferring email hosting from one host to another involves moving important data like scheduled appointments, emails, and contacts. It is important to make a proper transfer to avoid loss of data or other issues.
Here’s a detailed guide on how to transfer email hosting from one host to another:
1.Choose the Right Email Hosting Provider
Email hosting is much more than sending messages; it’s about the overall ecosystem that supports your business communication. Hence, it is important to choose the right email hosting provider to avoid potential issues and ensure seamless operations.
Here are the key aspects to look for in an email hosting provider:
- Reliability:This is essential because any downtime could lead to missed communications and cause damage to your business. Choose a reliable platform and never miss critical emails, whether they are client inquiries, internal communications, or important updates.
- Security:With increasing cyber threats, choose a provider with strong security features, including encryption and spam protection. This is especially important for protecting your email data during migration.
- Ease of Use:The email interface should be simple and user-friendly, even for those who aren’t tech-savvy.
- Scalability:As your business grows, the email service should easily handle more storage and additional features.
- Support:The provider should offer responsive and effective customer service.
A renowned hosting provider like BigRock will meet all these important criteria.
At BigRock, we offer:
- 9% guaranteed uptime and email deliverability
- Advanced features like anti-spam and anti-virus that offers robust security
- Protect your privacy—send emails with an alias to keep your primary address hidden
- Seamlessly switch to your new email with one click
- 24*7 dedicated support
Moreover, our email hosting plans cater to different needs. For instance, our professional email hosting plan is perfect for bloggers seeking to enhance their professional image. Our Business and Enterprise plan is ideal for growing companies and large enterprises. It offers advanced features such as protection against spam and viruses, support for multiple accounts, read receipts, a built-in calendar, email templates, and more.
Check out email hosting from BigRock to enhance your business communication.Once you have chosen your email hosting provider, it is time to prepare for migration.
2.Preparing for Email Migration—Backing up Email, Transferring Email Setting, and other
The last thing you want to deal with is lost emails or misconfigured accounts! Hence, proper preparation is essential for a smooth email migration. To avoid potential issues, make sure you have a backup of your emails and detailed documentation of your email settings before starting the transition.
Here’s how you can back up your current mail:
Different email providers have their own backup processes:
- Apple Mail: Open the Apple Mail app, select a mailbox, go to Mailbox, export Mailbox, and choose a destination to save your backup.
- Gmail:Use Google Takeout to back up your Gmail account. Open Google Takeout, select Mail, choose a file type and delivery method, then click Create Export.
- Microsoft Outlook:In Outlook, go to File, then Open and Export, choose Export to a file, and follow the prompts to create your backup.
Want to transfer your email settings? Here’s a step-by-step guide:
You can transfer any specific settings you’ve configured in your current email service to your new email hosting provider; here’s how:
- Apple Mail:Go to Preferences, click on Accounts, and note the details under Account Information and Server Settings.
- Gmail:Click the gear icon, go to See all settings, and document details under General, Labels, Filters, and Blocked Addresses.
- Microsoft Outlook:Go to File, go to Account Information, click on Account Settings, go to Server Settings, and record the configuration details.
3.Time to Create Email Accounts
Once you have selected an email hosting provider, it’s time to create email accounts to send and receive email.
Here’s how to create your email address on BigRock’s email hosting package:
- Login to your account
- You will now see a page with all your purchases on our system
- Click on the domain name for which you want to setup email
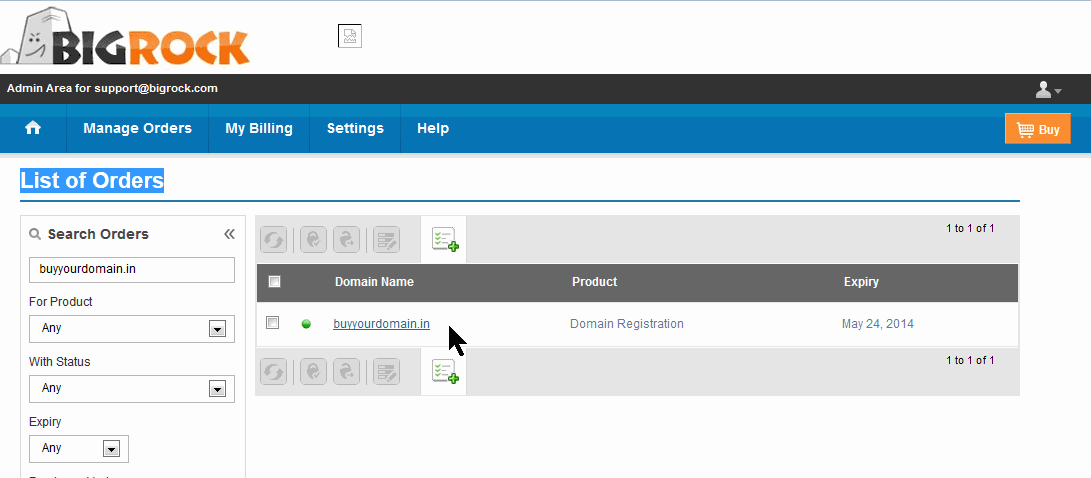
- Click on the ‘Email’ option at the right side of this page
- Click on ‘Manage Email’
- A new window will open with your Email Dashboard
- Click on ‘Add User’
- Enter your details along with the desired email address (Example: [email protected])
- Click ‘Add User’
That’s it, you’re done! Once completed, you can log in to start using your professional email account.
1.Recreate Previous Email Configurations
When switching email accounts, it’s important to replicate your previous email settings to ensure a smooth transition and keep your emails running smoothly.
Here are some common email configurations that you need to recreate:
- Forwards:If you have used email forwarding before, set it up again with your new provider. This way, emails sent to different addresses will be redirected to one main inbox, making it easier to manage all your messages in one place.
- Catch-All Addresses:A catch-all address receives emails sent to any invalid addresses on your domain. This ensures that emails sent to misspelt or incorrect addresses still reach your inbox.
- Auto responds:Recreate any automated responses you had, such as out-of-office replies, with your new BigRock email account.
- Email Filters and Rules:Set up filters or rules to organize your incoming emails, such as moving certain messages to specific folders or marking them as read, just like you did with your old email account.
2.Change Your Email DNS Records
To ensure your email services work correctly, it’s crucial to set the right DNS records. These records connect your custom domain with your email hosting, making sure that all emails sent to and from your domain are properly routed through the correct servers.
Here’s how to add BigRock’s email DNS records:
- Access DNS Management: Go to the DNS management section in your BigRock account by clicking on ‘Connect Domain.’
- Enter DNS Records: Input the required DNS records for BigRock’s email services. You can find the specific values under the ‘Expected records’ section in your cPanel dashboard. Don’t forget to save your changes once you’ve added them.
When moving your email from one host to another, you typically need these two records:
- Mail Exchange Record (MX Record)
MX Records tell you where to send incoming emails for your domain. Each MX Record has a priority to show which server should get the email first and a Time to Live (TTL) to decide how long the record is stored before being updated.
- Sender Policy Framework (SPF)
SPF shows which mail servers are allowed to send emails from your domain. This helps protect your domain’s reputation and stops people from pretending to be you.
- Domain Keys Identified Mail (DKIM)
DKIM helps make sure your emails are delivered properly and don’t get marked as spam by checking that they come from a trusted server. You can add this as a CNAME record.
Setting these records correctly helps ensure that your emails are properly routed, secure, and less likely to be flagged as spam.
3.Migrate Emails
Now that you have setup email addresses, it’s time to transfer your emails to your new email address. Here’s a step-by-step guide for migrating your emails to your new account.
- For users with BigRock’s Business Email
Go to the ‘email’ section in your BigRock cPanel dashboard. Click on the domain name where you need to host your email account. Look for ‘manage’ and ‘import email data’ in your DNS setting. Select ‘import a mailbox’ and follow the prompts to transfer your emails to the new BigRock mail server.
- For users opting for manual email backup and restore
If you prefer to handle the migration manually, export your emails from your old provider in MBOX or MIME format. In your BigRock account, go to the ‘emails’ section and click ‘Manage’ next to your domain. Navigate to ‘manage email accounts’ and click ‘webmail’ next to the account you want to import to. This will open your inbox. Click on ‘more’ and then ‘import’ in the webmail interface. Select the MBOX or MIME file you exported and click ‘import.’
- For users using third-party email migration tools
You can also use third-party tools to move your emails from one host to another. Choose a tool that supports both your old and new email providers, and follow the specific instructions provided by the tool.
4.Import Contacts
To ensure you don’t lose any important contacts when you move your email from one host to another, it’s essential to back up your contacts before making the switch. Most email providers allow you to export your contacts in .CSV or vCard format. You can import contacts to your new account by going to Settings→ Preferences→ Import Contacts. This way, you can import contacts either from Gmail or by uploading a .CSV file.
5.Setup Devices and Email Clients
Next, it’s time to set up your devices and email clients to work with your new email service.
When you move your email from one host to another, you need to update your email client settings to match the new provider’s parameters for fetching and sending emails. Here’s how to do it:
- Open Your Email Client. This could be on your desktop, phone, or a web application.
- Access Settings. Find the settings or account management section, usually under Preferences or Settings.
- Update Server Settings. Replace the old email server settings with the new ones from your current provider.
- Ensure your email client uses your full email address and password for both incoming and outgoing servers.
- Save and Restart. Save your changes and restart your email client.
- Send and receive a test email to make sure everything is working correctly.
6.Conduct Post-Migration Checks
The last step in moving your email from one host to another is conducting post-migration checks. You can test if your new email business account is working. Send test emails to and from your migrated account. Verify that emails are delivered promptly, and that attachments, formatting, and links are working correctly.
After that, you can do the following:
- Update Email Signatures: Make sure your email signature includes your contact details, links, and branding. Update it with any new information if you’ve changed email addresses.
- Update Email Contacts: Review and update your email contacts to correct any outdated information or add new details that might have been missed.
- Notify Your Contacts: Inform your contacts about your new email address to avoid miscommunication or confusion. Let them know if there will be any disruptions.
- Check Filters and Rules: Ensure that your email filters and rules, such as those that sort emails into specific folders, are still working as expected.
ALSO READ: Types of Email Hosting Services: A Comprehensive Guide
Why Is Email Migration Important?
Now that you know how to transfer email hosting from one provider to another, it’s time to look at some reasons for email migration.
1.Boosts Your Business’s Credibility
Using a professional email address gives your business a more professional appearance. People notice the difference between `[email protected]` and `[email protected]`. A custom email domain shows you are committed to your business and enhances your professional image.
2.Improves Email Delivery Rates
If you’re expanding your business and considering email marketing, having a custom email domain is crucial. It helps ensure that your marketing emails reach your audience’s inbox. Free email providers like Gmail have strict DMARC policies that can block or filter out emails that don’t pass their checks. Moreover, a professional email domain increases the likelihood that your emails will avoid spam filters and reach your recipients.
3.Old Providers May Not Be Efficient
Not all email providers offer the same level of performance. You might be considering a switch because your current provider isn’t meeting your needs. Some providers offer faster service, more storage, or better cost efficiency. When migrating your email, carefully evaluate the features and benefits of potential new providers to ensure they align with your needs.
ALSO READ: What Is Business Email Hosting?: The Ultimate Guide
Conclusion
Transferring your email from one host to another is a process that requires meticulous planning and execution. This guide simplifies the email migration process. However, if you still have questions about how to transfer email hosting from one host to another, refer to our FAQ on email migration.
Frequently Asked Questions (FAQs) on Email Migration
1.How do I backup my emails before migration?
Most popular email apps like Gmail, Outlook, and Apple Mail have options to backup your emails. You can also use third-party tools to handle attachments, save messages, and back up your settings and other details.
2.What common issues will I experience during email migration?
You might face problems like syncing issues, lost data, wrong settings, or missing emails during transferring email hosting. But with a good guide and careful planning, most people can avoid these problems and make the process go smoothly.
3.How do I check if the new email setup is working?
After setting up your new email, send an email to your new email id to make sure everything works. Additionally, check that attachments open correctly, update your email signatures, and make sure your email sequences and folders are still the same. It’s a good idea to test everything regularly for a few days after the move.
Still confused? Drop a comment below!