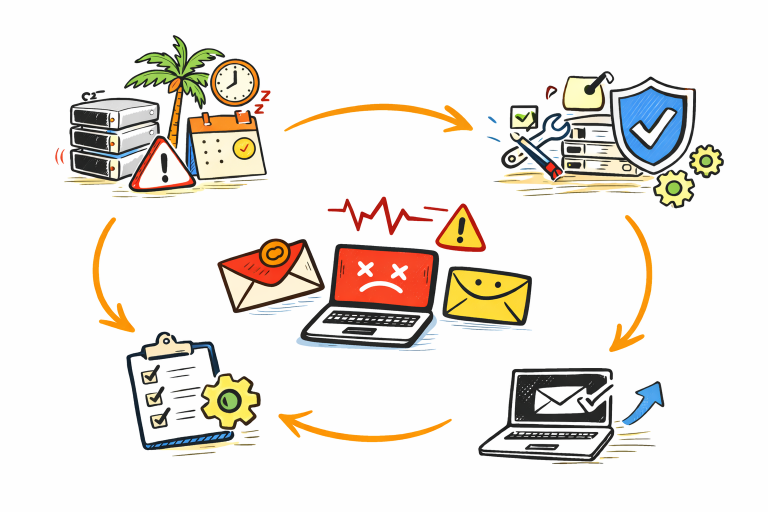
| Nameservers are the “traffic controllers” of the internet. They are specialised servers within the Domain Name System (DNS) that store the records telling the world where your website and email services are physically located. |
Few tasks feel as nerve-wracking as clicking “Save” on a nameserver change. One wrong move and it can feel like your entire online presence is at risk: website down, email bouncing, clients calling.
In reality, the risky part is not the act of changing nameservers. The danger lies in missing or misconfigured DNS records. When you treat nameserver changes as a structured process instead of a blind switch, you can move any domain cleanly, keep email working, and actually improve your DNS management and security.
The walkthrough below stays vendor-agnostic and gives you a repeatable process you can use across projects, clients, and environments.
What Nameservers are and Why Changing them Matters
Nameservers are part of DNS management that tell the internet which DNS service is authoritative for your domain. They answer, “Where should I look up DNS records like A, MX, and TXT for this domain?”
At a high level, NS records sit inside the global DNS hierarchy and point resolvers to the correct DNS host for your domain. Your registrar stores which nameservers are authoritative, and those nameservers in turn serve your DNS zone with all your records, like website IPs and mail servers.
It helps to separate two layers:
- Registrar-level nameserver settings
These are the NS values you configure where you registered the domain. They delegate your domain to a specific DNS provider. - NS records inside your DNS zone
These sit in your zone file at the DNS provider and should list the same authoritative nameservers. If registrar-level NS and in-zone NS records do not align, you can see intermittent or region-specific resolution issues.
You typically change nameservers when you:
- Move DNS hosting to a new provider or cloud platform.
- Use a CDN or security service that requires you to delegate DNS to them.
- Consolidate many domains under one DNS management panel for easier control.
Handled correctly, changing nameservers is safe and reversible. If something goes wrong, you can always revert to the old nameservers at your registrar while you fix DNS records.
Before You Change Nameservers: Pre‑Flight Checklist
Most nameserver “disasters” come from missing, wrong, or incomplete DNS records, not the change itself. Treat this like a pre-flight check for a production deployment.
Your goals before you touch the registrar are:
- Capture a complete snapshot of your existing DNS zone.
- Recreate that configuration at the new DNS provider.
- Choose a low-risk window and define a clear rollback path.
Once those are in place, the actual flip is a routine, low-stress action.
Inventory All Current DNS Records
Start by logging in to your current DNS provider or registrar and opening the DNS management or zone editor. You want a full picture of every record that keeps your business running.
List and document:
- A / AAAA records for your website, apps, and any dedicated IP-based services.
- CNAME records for aliases such as www, api, cdn, or login.
- MX records that route your domain email.
- TXT records used for:
- SPF (email sending policy)
- DKIM (signing outbound email)
- DMARC (email authentication policy)
- Third-party verifications (CRMs, analytics, domain ownership)
- SRV, CAA, SOA, NS, and any custom records specific to your stack.
If your provider supports it, export the full zone file. If not, manually copy everything into a secure document and keep it versioned.
Because DNS affects your communication and reputation, double-check SPF, DKIM, and DMARC values. A small typo there can cause emails to be rejected or marked as spam after the move.
Prepare Your New DNS Provider
Next, prepare the place that will become authoritative for your domain.
- Sign in to your new DNS service and open its DNS management panel.
- Create a DNS zone for your domain if it does not already exist.
- Import or manually recreate each DNS record you documented:
- Keep hostnames, record types, and TTLs as close to the original as possible.
- Where available, use any tools your provider offers to auto-detect or validate imports. Many platforms will highlight unsupported or conflicting records so you can fix them before you flip.
Plan Timing and a Rollback Option
Finally, plan when you will change nameservers and how you will undo it if something unexpected appears.
- Choose a low-traffic window, especially if your site or app is business-critical.
- Keep login credentials handy for both old and new DNS providers, as well as your registrar.
- Record your current nameserver values in your pre-flight document. Your rollback step is simply restoring these values at your registrar if the new DNS setup misbehaves.
Schedule your nameserver change when you have 30–60 minutes free to test your site and email immediately afterward, so you can catch and fix any issues while the change is fresh.
Step‑by‑Step: How to Change Nameservers at Any Registrar
Every registrar UI looks a little different, but the flow is effectively the same everywhere. You only need one critical piece of information before you start: the new nameserver values (for example ns1.example-dns.com, ns2.example-dns.com) from your DNS provider.
The steps below work for virtually any registrar.
Step 1 – Locate Your Domain’s Nameserver Settings
- Log in to your domain registrar account (where you purchased the domain).
- Go to your Domain List / My Domains.
- Click the domain you want to update.
- Look for a section labeled:
- “DNS Management”
- “Nameservers”
- “Custom DNS”
- Or similar.
Some domain extensions have specific rules about which nameservers you can use or how many are required. Pay attention to any warnings or help text shown for your TLD.
Step 2 – Enter the New Nameserver (NS) Values
Once you are in the nameserver settings:
- Choose the option that lets you set custom nameservers instead of “default” or “parked” DNS.
- Carefully paste in the new NS values from your DNS host. Typically you will have at least:
- ns1.your-dns-host.com
- ns2.your-dns-host.com
Some providers also give you ns3 and ns4 for redundancy.
- Double-check for:
- Spelling and typos.
- Extra spaces.
- Trailing dots. Some registrars expect ns1.example.com, others accept ns1.example.com. and append the dot automatically. Follow their instructions.
- Save or confirm the changes. Your registrar may show a confirmation message or send a verification email depending on its policies.
Step 3 – Align In‑Zone NS Records
After the registrar-level change, make sure the NS records inside your DNS zone at the new provider reflect the same nameservers.
- Open your new DNS management interface.
- Check the NS records at the root of your domain.
- If they do not match the values you just set at the registrar, update them.
If registrar and in-zone NS records disagree, some resolvers may still follow the old delegation path, which can lead to intermittent or location-specific issues that are hard to debug.
Step 4 – Wait for DNS Propagation
After you click save, nothing “magical” happens. The change goes through a normal DNS refresh cycle often referred to as “propagation.”
What is really happening is that DNS resolvers and caches around the world gradually refresh their information and start using your new nameservers instead of the old ones.
In practice:
- Many lookups start using the new nameservers within minutes.
- Some networks may keep the old data until their cached records expire based on the TTL (time to live) set on your previous NS records.
Avoid the temptation to keep changing settings every few minutes. Make the change once, then move straight to structured testing.
Once your new nameservers are saved, keep your browser tab open and move directly into verification so you can spot and fix any issues early.
How to Verify Your Nameserver Change Worked
For business-critical websites and email, verification is non-negotiable. You want to confirm three layers:
- Nameservers and DNS records resolve correctly.
- Websites and subdomains load as expected.
- Email and integrations keep working.
Check Nameservers and DNS Resolution
Use a mix of web-based DNS tools and command-line utilities like nslookup or dig if you are comfortable.
Check two things:
- NS records
Query the NS records for your domain and confirm that:- The authoritative nameservers match the ones from your new provider.
- The responses come from the correct DNS host, not your old one.
- Key DNS records
Query A, CNAME, MX, and important TXT records:- A / CNAME resolve to the expected IPs or hostnames for your site or CDN.
- MX points to the correct mail service.
- TXT values for SPF/DKIM/DMARC match what you configured.
If anything looks off, adjust it at the new DNS provider and retest.
Test Website and Key Subdomains
Next, open your sites in a browser.
- Test your root domain (example.com) and www.example.com.
- Use a private or incognito window and, if possible, a second network (like mobile data) to see how different resolvers behave.
- Visit business-critical subdomains such as:
- app.
- api.
- admin.
- Client or partner portals.
If you use a CDN or security layer in front of your site, make sure the expected version loads, not a parked or fallback page.
Confirm Email and Business Integrations
Finally, verify that email and third-party integrations still work as expected.
- Send and receive test emails from addresses on your domain (for example, [email protected]).
- Confirm:
- Outbound emails arrive in external inboxes.
- Inbound emails reach your mailboxes reliably.
- For integrated services that depend on DNS, like:
- CRM domain verifications,
- SSO / identity providers,
- Payment gateways,
- Tracking and analytics tags,
log in and confirm they show “connected” or “verified” statuses where applicable.
Monitor email bounce messages and system logs for at least 24 hours after the change so you can quickly spot and resolve any authentication or routing problems.
If your DNS host provides monitoring or alerts, enable them so you are notified quickly if any record stops resolving.
Take Control of Your DNS Without Fear
Changing nameservers does not have to be a gamble. When you treat it as a structured process, the “risky” part becomes a predictable sequence of checks: inventory your DNS, prepare the new zone, flip nameservers, then verify and secure.
The real work lives in accurate DNS management and disciplined verification, not in the single button click at your registrar. Over time, keeping a living DNS inventory for each domain and standardising this workflow across your team or agency turns nameserver changes into routine maintenance instead of a high-stress event.
Ready to put this into practice? Get in touch with BigRock today!