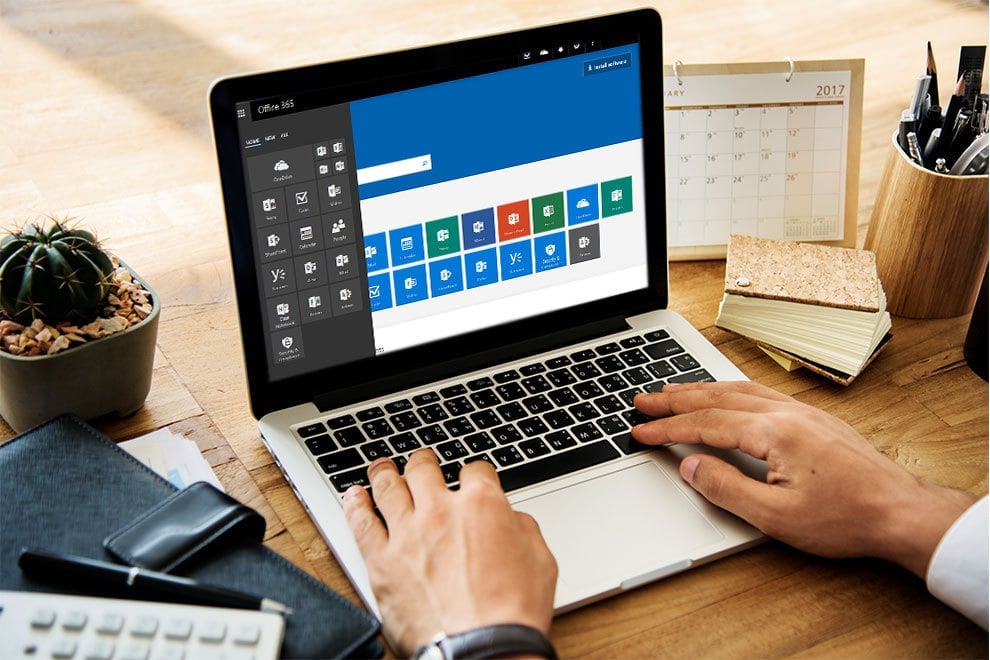
To set up a custom email address with Office 365, first log onto the portal. Then, navigate to the admin center via the ‘apps’ option. When you click on the ‘set up email with a custom domain’ option, you will be directed to the setup wizard. Enter your domain name in the setup wizard and update your domain’s DNS settings. Once you have entered the DNS record, you can go back to the Office 365 tab and click the ‘Connect email’ button.
Setting up a custom email address might seem intimidating, but it’s quite manageable with the right guidance. Moreover, if you are running a business, setting up a custom email address with Office 365 is crucial. A professional email address can significantly enhance your credibility and make your business appear more legitimate.
In this guide, we’ll walk you through setting up an Office 365 custom domain email in three simple steps.
How to set up a Custom Email Address with Office 365
Signing up for the Microsoft 365 Business premium subscription is the first step to setting up a custom email. After purchasing the premium Office 365 plan, you need to choose and register a domain name. It serves as a foundation for your professional email address, allowing you to replace generic email domains like ‘@gamil.com’ with a personalized one that reflects your business or brand, such as ‘@yourbrandABC.com’ . This not only enhances your brand’s credibility but also ensures consistent and professional communication with clients and partners.
Once you have these, follow these steps to set up your custom email address:
1.Add and Verify Your Domain Name
- Log into your Microsoft 365 account and navigate to the admin center. Use the setup To create a custom email, you need the Microsoft 365 Business Basic plan or higher.
- Navigate to the ‘Add Domain’ section, and enter your domain (e.g., XYZ.com). Click ‘Use this domain.’
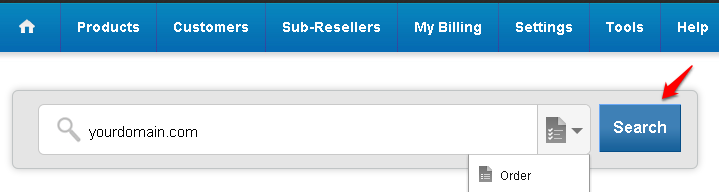
- You will be redirected to the Domain Verification screen. Choose the option to ‘Add a TXT record’ to add your domain’s DNS records to connect your email account to your domain. You can get your domain’s ‘TXT records’ from your hosting dashboard or cPanel. Then, type the domain name in the search field on the homepage, select the ‘Order’ option from the drop-down, and click on Search. Click on ‘DNS details’ to view the required DNS records. A window will open up showing the DNS details of your domain.
- Once you’ve added the TXT record, return to the Microsoft admin center and click on ‘Verify.’
After verification, you can add users with email addresses like [email protected]. You can complete this step later, if needed.
2.Set Up Your DNS Records and Online Services
- You can set up DNS records manually, or Microsoft can handle this if your domain is registered with specific providers like BigRock.
- If you choose automatic setup, Microsoft will populate the necessary details. Otherwise, you’ll need to add records manually.
- If you choose to add DNS records manually, go to your cPanel, and find where to create custom MX records. Enter the values provided by Microsoft 365 and remove any existing MX records to ensure your email is delivered to Microsoft.
- Then, add CNAME and SRV records as specified by Microsoft. You might also want to add a TXT record with an SPF value to reduce spam.
3.Update Your Nameservers
To set up a custom email address with Office 365, you need to update your name servers. This step assigns Microsoft 365 as the DNS host for your email account. Here’s how you can update the name servers:
- Go to the cPanel, navigate to the ‘DNS details’ section for nameserver records, and update them with at least two Microsoft nameservers provided in the set up
- It may take up to 30 minutes for the changes to take effect. Once done, return to the Microsoft admin centre and click ‘continue’.
Congratulations! Your Microsoft 365 custom email address set up is complete. Users added during this set up will receive their login details to start managing their business communications.
ALSO READ : Why You Need a Custom Email Address For Your Business
How to add users to your custom email address
Now that you have created a custom email address, you can now add users. That is, more people will be assigned custom email addresses and will have access to all Microsoft-powered business communication apps.
Here’s how you can add users:
- Go to ‘Users’ and click on the ‘Active Users’ option.
- Click on the ‘Add A User’ option.
- On the next screen, you need to provide the user’s personal information and create a custom email address for them.
- After entering the details, simply click on the ‘Next’ button.
- Then, you will need to select a geographic location for your user and assign a product license. When you are done, simply click on the ‘Next’ button.
Note that Microsoft also offers additional settings for new user profiles. For example, you can select a user and add information, like their job title, department, office, and more, to their profile. This is particularly helpful for organizations that use Microsoft 365 for business communication.
ALSO READ : Why Your Email Address Should Match Your Domain Name
Conclusion
Using a generic email address will not do your business any favours. To present a professional image and enhance your business’s legitimacy, setting up a custom email address with Office 365 is crucial.
Enhance your communication with BigRock’s email hosting establish trust and credibility in every email interaction. We also offer a wide range of Google Workplace plans that allow you to manage business communication hassle-free. With BigRock, you get 24/7 customer support that ensures a seamless and professional email setup. 
Frequently Asked Questions (FAQs)
1.How Do I set up personal email in Outlook 365?
Here is how to set up a personal email account in Outlook:
Step 1: Go to ‘File’ and click on ‘Add account’.
Step 2: On the next screen, enter your email address and click on ‘Advanced options’.
Step 3: Check the box that says, ‘Let me set up my account manually’ and click on ‘Connect’.
Step 4: Next, choose your account type (mostly, it is “IMAP” for personal email).
Step 5: Then, enter your email server settings, including the incoming and outgoing mail server details.
Step 6: Type in your email account password when prompted.
Step 7: Click on ‘Connect’ and wait for Outlook to verify and set up your account.
2.Can I create multiple email addresses in Office 365?
Yes, you can create multiple email addresses in Microsoft 365.
Here is how you create multiple email addresses:
- Log into your Office 365 account with administrator rights.
- Go to the Microsoft 365 Admin Center.
- Select ‘Users’ from the menu on the left and click on ‘Active users.
- Click on ‘Add a user’ to create a new email account.
- Fill in the required details for the new user, including the new email address.
- Assign the necessary licenses and configure the mailbox settings.
- Click on ‘Finish’ to complete the setup. The new email address will now be active.
You can repeat this process to create additional email addresses as needed. Each email address will have its own mailbox and settings within Office 365.
3.How do I set up an external email address in Office 365?
Here is how you can set up an external email address or create a new contact in Office 365:
- Log into Microsoft Office 365 with administrator rights.
- Navigate to Admin–> Exchange–> Exchange Admin Center–> Recipients–> Contacts.
- Then, click on the ‘add’ button and select ‘mail contact’.
- Add the user created in Outlook.com as a new contact.
- Click on the ‘Save’ button to add an external email address to your Outlook account.
4.How many email addresses do I get with Microsoft 365?
Normally, there is only one primary email address associated with a Microsoft account. However, you can create multiple secondary Microsoft or Outlook accounts if needed.