| Cryptographic signing helps mail servers verify authenticity and prevent tampering during delivery. Careful DNS publishing, selector planning, monitoring, and regular key rotation reduce spoofing risks, improve inbox placement and strengthen sender reputation across multiple email platforms. |
An accounts team chases a customer about an unpaid invoice, only to discover the email never landed in the inbox. Worse, a look-alike message has already tricked that customer into paying for a fraudulent account. Situations like these cost time, money and hard-won trust.
DomainKeys Identified Mail (DKIM) solves a big slice of this problem by adding a cryptographic signature to every outbound message. Receiving mail servers can prove the message is authentic and unaltered, improving inbox placement and blocking obvious spoofing attempts.
When a DKIM setup is done correctly, organisations see fewer impersonation attacks, stronger brand credibility and more reliable email delivery.
This blog explains how to publish DKIM records, enable signing, test the results and fix common errors without tearing up the mail pipeline.
What DKIM Actually Does and Where It Fits
DKIM adds a digital signature to pre-selected headers and the message body. Your mail server signs with a private key, while a matching public key sits in the DNS so recipients can verify the signature.
DKIM is one pillar of a three-part strategy:
- SPF confirms the sending IP is allowed.
- DKIM confirms the message is authorised and intact.
- DMARC tells receivers how to act when SPF or DKIM fail and lets you see their reports.
DKIM cannot hide your address from spam lists or guarantee 100 % delivery, but aligned with SPF and an enforcement-level DMARC policy it sharply reduces spoofing and maintains sender reputation.
Before You Start: Inventory, Decisions and Prechecks
Before touching DNS, make a quick checklist:
- Inventory sending domains and sub-domains. Include every third-party platform, marketing tool and CRM that sends on your behalf.
- Decide who manages keys. Some ESPs handle generation and rotation for you; others expect self-managed keys.
- Choose key length. Prefer 2048-bit RSA keys when the platform supports them; 1024-bit is now considered the minimum only for legacy systems.
- Plan selector naming and rotation cadence. Quarterly or twice-yearly rotation is common practice.
- Confirm access. Ensure you have DNS control and admin rights on the email platform or ESP.
How to Configure DKIM for Secure Email Delivery: AStep-by-Step Setup Guide
Below is the practical flow most teams follow: generate the keys, publish the DNS record, enable signing and verify everything works.
Generate a Secure Key Pair
If you self-manage keys, use OpenSSL or your mail server’s built-in tool:

Keep the private key in a restricted store or an HSM. When your ESP offers managed DKIM, it will generate keys for you and simply give you DNS values to publish.
Choose and Name Your Selector
The selector is a label that tells receivers which DNS record holds the public key. A clear scheme makes life easy during audits and rotation:
selector._domainkey.example.com
Example selectors:
- txn2026q1 for transactional mail, Q1 2026
- mktg2026q1 for marketing mail
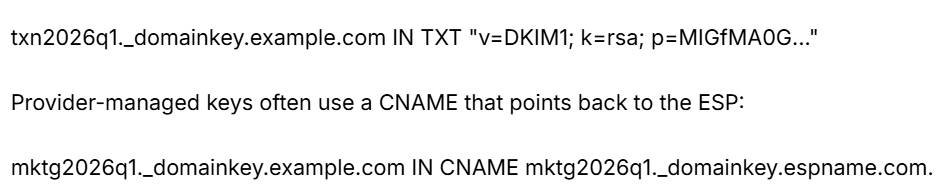
Publish the Public Key in DNS (TXT or CNAME)
Self-managed keys use a TXT record:
Tips for smooth publishing:
- Paste the key exactly as supplied, no extra spaces or line breaks.
- Use a modest TTL (e.g., 300 s) while testing, then raise it once stable.
- Check propagation with dig or an online DKIM checker.
Enable DKIM Signing in Your Mail Platform or ESP
In server settings or the ESP dashboard, enable DKIM, specify the selector and upload or reference the private key. Send a controlled test email to a mailbox you own and inspect the headers before turning it on for production traffic.
Test, Verify and Roll Out
- Send a test message to a Gmail or Outlook address.
- View the full headers and look for DKIM-Signature: and an Authentication-Results: line that says dkim=pass.
- Use an online validator for a second opinion.
- Enable signing for one stream first, monitor, then expand to the remaining streams.
- When rotating keys later, publish the new selector and leave the old one in place for at least 72 hours to cover messages already in transit.
Key Management Best Practices
Regular upkeep keeps DKIM trustworthy and avoids last-minute panic.
- Rotation policy: Rotate keys at a predictable cadence, quarterly for higher-risk streams, twice a year for low-volume systems.
- Selector strategy: Map selectors to streams and include human-readable tokens (e.g., txn2026q2).
- Secure storage: House private keys in password-protected stores or HSMs; restrict admin access to the minimum.
- DNS TTL tactics: Lower the TTL a day before rotation, publish the new key, wait for validation, then raise the TTL again.
| Pro Tip: Lower your DNS TTL to just a few minutes, 24–48 hours before a planned key rotation. That way, the new selector propagates quickly, and you can revert to a comfortable TTL once validation passes. |
Troubleshooting Common DKIM Failures
Even a perfect first setup can hit roadblocks. Recognise the patterns and you will fix them faster.
| Symptom | Likely Cause |
| Signature present but dkim=fail | Message modified in transit (link tracking, footers) |
| Selector not found | DNS record is mis-named or not yet propagated |
| Inconsistent passing/failing | A load balancer uses an old key, or multiple MTAs use different selectors |
| DMARC fails despite DKIM pass | Alignment mismatch between the d= domain and the visible from address |
Diagnostic flow:
- Inspect headers to note the selector and signing domain.
- Query DNS directly: dig selector._domainkey.example.com txt.
- Send the message in plain text with no footers to see if a gateway modifies it.
- Check DMARC aggregate reports for patterns.
Quick fixes range from correcting typos in DNS to disabling problematic footers or asking the ESP to re-sign after link tracking.
DKIM With Third-Party Senders and DMARC Alignment
Every extra platform that sends to your domain is a new point of failure, so clarity is key.
- Provider-managed DKIM: The ESP supplies CNAMEs; you publish them. Easy rotation, minimal effort.
- Customer-managed DKIM: You create keys and TXT records. Full control, more work.
- Delegated sub-domains: marketing.example.com is assigned to the marketing platform so it can manage DKIM independently.
Ask each provider:
- Which DKIM mode do you support, CNAME or TXT?
- Do you rotate keys automatically?
- Will the selector align with the visible From domain? Alignment matters because DMARC checks that the d= domain in DKIM matches (or is a sub-domain of) the From address.
For agencies juggling many clients, keep an authorised-sender spreadsheet and insist on proof of DKIM signing before any campaign goes live.
Monitoring, Automation and Next Steps
Once DKIM is running, ongoing visibility prevents silent failures.
- Monitor DMARC reports. They will highlight sources where DKIM fails or is missing.
- Track pass rates. A sudden drop signals a new sender or a broken rotation script.
- Automate where possible. Some mail gateways can auto-rotate keys; lightweight scripts can update DNS and remove old selectors in one go.
- Maintain a simple playbook. Include your sending-domain inventory, rotation calendar and emergency contacts so rota staff can react quickly.
DKIM For the Win
Deploying DKIM sounds technical, yet the reality is straightforward: generate a secure key, publish a correctly-named DNS record, enable signing and verify. Combine that with routine rotation, selective monitoring and solid alignment with SPF and DMARC, and you have a resilient barrier against spoofing and a boost to inbox placement.
Need a hassle-free way to publish those TXT or CNAME records? BigRock’s domain and DNS hosting make DKIM changes painless. Get your DKIM test run today and start signing with confidence.